Docker has revolutionized the way we build, ship, and run applications by enabling containerization. At the heart of Docker lies the Dockerfile, a simple yet powerful script that defines how a Docker image is built. Writing efficient Dockerfiles is critical for creating lightweight, secure, and performant container images. This article provides a deep dive into Dockerfiles, covering their structure, best practices for writing them, and advanced techniques for managing layers efficiently.
What is a Dockerfile?
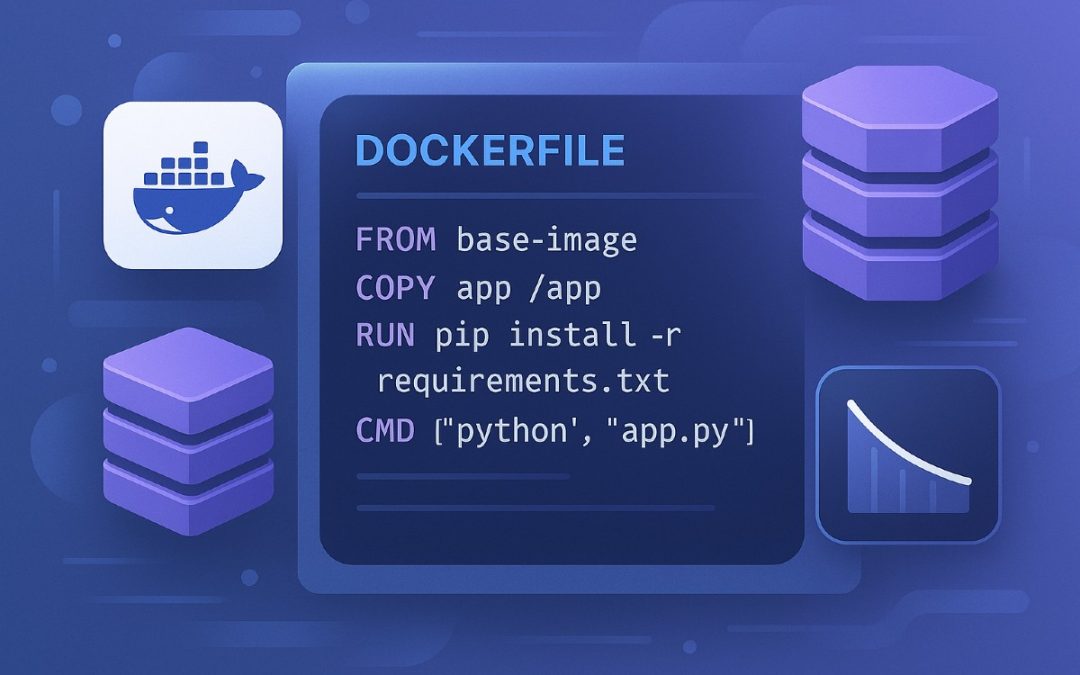
A Dockerfile is a text file containing a series of instructions that Docker uses to build a container image. Each instruction in a Dockerfile creates a new layer in the resulting image, and these layers are cached and reused to optimize the build process. Docker images are essentially snapshots of a container’s filesystem and configuration, and Dockerfiles are the blueprints for creating them.
Dockerfiles are platform-agnostic, easy to version control, and highly reproducible, making them a cornerstone of modern DevOps workflows. A well-crafted Dockerfile ensures that your application is portable, efficient, and secure.
Anatomy of a Dockerfile
A Dockerfile consists of a series of instructions, each with a specific purpose. Below are the most common instructions you’ll encounter:
- FROM: Specifies the base image to start with (e.g., FROM ubuntu:20.04).
- RUN: Executes commands in the container during the build process (e.g., RUN apt-get update).
- COPY: Copies files or directories from the host to the container’s filesystem (e.g., COPY . /app).
- ADD: Similar to COPY, but also supports extracting tarballs and fetching URLs.
- WORKDIR: Sets the working directory for subsequent instructions (e.g., WORKDIR /app).
- EXPOSE: Documents which ports the container listens on (e.g., EXPOSE 8080).
- CMD: Specifies the default command to run when a container starts (e.g., CMD [“python”, “app.py”]).
- ENTRYPOINT: Configures the container’s executable, often used with CMD (e.g., ENTRYPOINT [“nginx”]).
- ENV: Sets environment variables (e.g., ENV PATH=/usr/local/bin:$PATH).
- ARG: Defines build-time variables (e.g., ARG VERSION=1.0).
- VOLUME: Creates a mount point for persistent storage (e.g., VOLUME /data).
- USER: Sets the user for running subsequent instructions (e.g., USER appuser).
Each instruction adds a layer to the image, and understanding how these layers work is key to writing efficient Dockerfiles.
Each instruction adds a layer to the image, and understanding how these layers work is key to writing efficient Dockerfiles.
How to Write a Dockerfile: Step-by-Step
Let’s walk through the process of writing a Dockerfile for a simple Python web application using Flask. The goal is to create a lightweight and secure image.
Example Application
We have a Flask application with the following structure:
myapp/
├── app.py
├── requirements.txt
└── Dockerfile
app.py:
from flask import Flask
app = Flask(__name__)

@app.route('/')
def hello():
    return 'Hello, Docker!'

if __name__ == '__main__':
    app.run(host='0.0.0.0', port=8080)
requirements.txt:
flask==2.0.1Step 1: Choose a Base Image
Start with a minimal base image to reduce the image size and attack surface. For Python applications, the official python image is a good choice. Use a specific tag (e.g., python:3.9-slim) to ensure reproducibility.
FROM python:3.9-slimThe slim variant is smaller than the full Python image, as it includes only the essentials.
Step 2: Set the Working Directory
Set a working directory to keep the container’s filesystem organized.
WORKDIR /appStep 3: Copy Dependency Files
Copy the requirements.txt file and install dependencies. This ensures that dependencies are cached in a separate layer, speeding up rebuilds if only the application code changes.
COPY requirements.txt .
RUN pip install --no-cache-dir -r requirements.txt
The –no-cache-dir flag prevents pip from caching packages, reducing the image size.
Step 4: Copy Application Code
Copy the application code into the container.
COPY . .Step 5: Expose the Port
Document the port your application listens on.
EXPOSE 8080Step 6: Define the Default Command
Specify the command to run the application. Use the exec form ([“command”, “arg1”, “arg2”]) for proper signal handling.
CMD ["python", "app.py"]Complete Dockerfile
Here’s the complete Dockerfile:
FROM python:3.9-slim
WORKDIR /app
COPY requirements.txt .
RUN pip install --no-cache-dir -r requirements.txt
COPY . .
EXPOSE 8080
CMD ["python", "app.py"]
Step 7: Build and Test
Build the image:
docker build -t myapp .Run the container:
docker run -p 8080:8080 myappVisit http://localhost:8080 to see the application running.
Managing Layers Efficiently
Docker images are composed of layers, each corresponding to a Dockerfile instruction. Layers are cached and reused during builds, which speeds up the process but can lead to bloated images if not managed carefully. Below are best practices for optimizing layers and keeping your images lean.
1. Minimize the Number of Layers
Each instruction creates a new layer, so combine related commands where possible. For example, instead of:
RUN apt-get update
RUN apt-get install -y curl
Combine them into a single RUN instruction:
RUN apt-get update && apt-get install -y curlThis reduces the number of layers and ensures that temporary files (e.g., apt caches) are not persisted in separate layers.
2. Leverage Layer Caching
Docker caches layers based on the instruction and its inputs. Order instructions from least to most likely to change to maximize cache hits. For example, copy dependency files (requirements.txt) before application code, as dependencies change less frequently.
COPY requirements.txt .
RUN pip install -r requirements.txt
COPY . .
If only app.py changes, Docker reuses the cached layer for installing dependencies.
3. Clean Up Temporary Files
Remove temporary files in the same RUN instruction to avoid bloating layers. For example, when installing packages:
RUN apt-get update && apt-get install -y \
    curl \
    && rm -rf /var/lib/apt/lists/*
This removes the apt cache in the same layer, keeping the image smaller.
4. Use Multi-Stage Builds
Multi-stage builds allow you to use multiple FROM statements in a single Dockerfile, enabling you to build artifacts in one stage and copy only the necessary files to the final image. This is especially useful for compiled languages like Go or Java.
Example for a Go application:
# Build stage
FROM golang:1.18 AS builder
WORKDIR /app
COPY . .
RUN go build -o myapp

# Final stage
FROM alpine:3.15
WORKDIR /app
COPY --from=builder /app/myapp .
CMD ["./myapp"]
The final image contains only the compiled binary and a minimal base image (alpine), significantly reducing the size.
5. Use .dockerignore
Create a .dockerignore file to exclude unnecessary files (e.g., .git, node_modules, or test files) from being copied into the image. This reduces the build context size and prevents sensitive files from being included.
Example .dockerignore:
.git
node_modules
*.md
tests/
6. Choose Minimal Base Images
Always opt for minimal base images like alpine, slim, or distroless. For example:
- python:3.9-slim instead of python:3.9.
- gcr.io/distroless/base for a bare-bones runtime environment.
Distroless images are particularly lightweight and secure, as they contain only the application and its runtime dependencies.
7. Avoid Unnecessary Dependencies
Install only the dependencies your application needs. For example, when using apt-get, specify exact packages and avoid installing recommended or suggested packages:
RUN apt-get update && apt-get install -y --no-install-recommends \
    curl \
    && rm -rf /var/lib/apt/lists/*
8. Use Specific Image Tags
Avoid using the latest tag for base images, as it can lead to inconsistent builds. Instead, use specific versions (e.g., python:3.9.10-slim) to ensure reproducibility.
9. Run as Non-Root User
For security, run your application as a non-root user. Create a user and set it with the USER instruction:
RUN useradd -m appuser
USER appuser
10. Optimize for Build Performance
- Parallelize builds: If your application has independent components, consider splitting them into separate Dockerfiles or using multi-stage builds to parallelize tasks.
- Use buildkit: Enable Docker BuildKit for faster and more efficient builds. Set DOCKER_BUILDKIT=1 or use –buildkit with the docker build command.
Advanced Techniques
Conditional Instructions with ARG and ENV
Use ARG for build-time variables and ENV for runtime variables to make your Dockerfile more flexible. For example:
ARG APP_VERSION=1.0
ENV APP_VERSION=$APP_VERSION
RUN echo "Building version $APP_VERSION"
Pass the argument during the build:
docker build --build-arg APP_VERSION=2.0 -t myapp .Health Checks
Add a HEALTHCHECK instruction to monitor your application’s health:
HEALTHCHECK --interval=30s --timeout=3s \
    CMD curl -f http://localhost:8080/ || exit 1
This ensures that Docker can detect and restart unhealthy containers.
Multi-Platform Builds
Use Buildx to create images for multiple architectures (e.g., AMD64, ARM64):
docker buildx create --use
docker buildx build --platform linux/amd64,linux/arm64 -t myapp --push .
This is useful for deploying to diverse environments like cloud providers or IoT devices.
Common Pitfalls and How to Avoid Them
- Large Images: Avoid bloated images by using minimal base images, multi-stage builds, and cleaning up temporary files.
- Cache Invalidation: Be mindful of the order of instructions. Changing a frequently modified file early in the Dockerfile invalidates subsequent layers.
- Security Risks: Don’t run containers as root, and avoid including sensitive data (e.g., API keys) in the image. Use secrets management instead.
- Incorrect CMD Usage: Use the exec form ([“command”, “arg1”]) instead of the shell form (command arg1) to ensure proper signal handling.
- Ignoring .dockerignore: Always use a .dockerignore file to exclude unnecessary files from the build context.
Tools for Dockerfile Optimization
- Docker Scout: Analyzes images for vulnerabilities and provides optimization suggestions.
- Dive: A tool for exploring image layers and identifying bloat.
- Hadolint: A Dockerfile linter that checks for best practices and potential issues.
- Trivy: A vulnerability scanner for Docker images.
Conclusion
Writing efficient Dockerfiles is both an art and a science. By understanding how Docker layers work and following best practices—such as minimizing layers, leveraging caching, using multi-stage builds, and choosing minimal base images—you can create lightweight, secure, and performant container images. Whether you’re building a simple web app or a complex microservices architecture, mastering Dockerfiles is essential for success in containerized environments.
As you experiment with Dockerfiles, use tools like Docker Scout, Dive, and Hadolint to refine your images further. With practice, you’ll be able to craft Dockerfiles that are not only functional but also optimized for speed, size, and security.
Power Your Projects with vpszen.com VPS Solutions
Looking for reliable hosting to run your Linux servers and host your next big project? VpsZen.com has you covered with top-tier VPS options tailored to your needs.
Choose from ARM64 VPS Servers for energy-efficient performance, or Root VPS Servers for virtual servers with dedicated resources.